Our Blog

Make Your Own Soft & Silke Scarf - Bonus warping board tutorial!
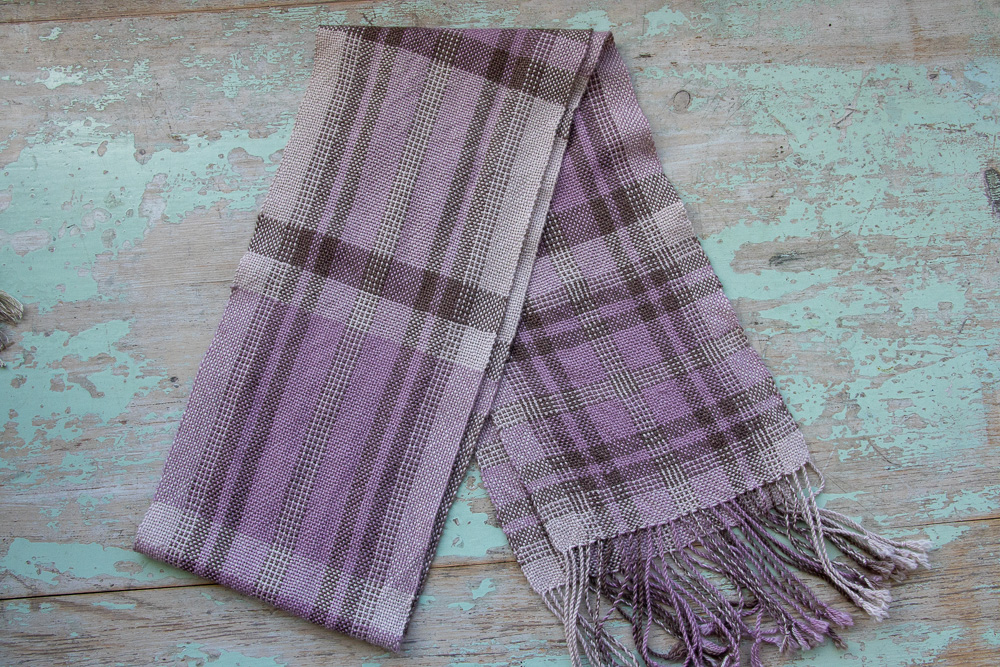
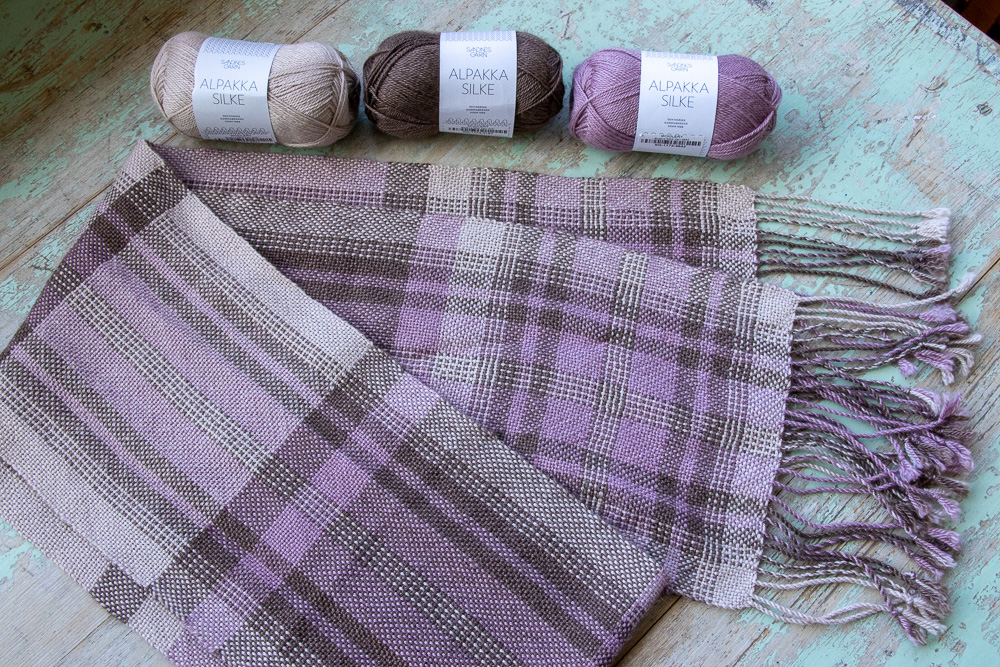
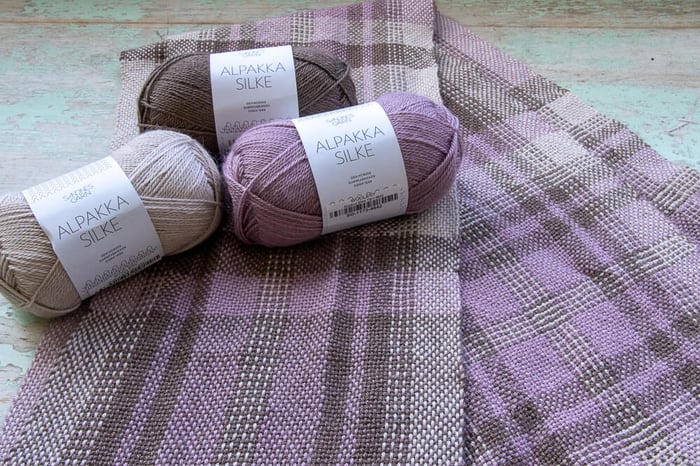
Ever since we got this new to us yarn back in May we’ve been so excited to use it for something. Inspiration finally struck with these gorgeous neutrals with a pop of purple from Sandnes Garn Alpakka Silke! With the warp sequence that Amy designed, the resulting scarf is as beautiful as it is soft! The best part? You only need 3 skeins to make a 100 inch scarf (we even had a bit leftover)!
Materials Needed
- Loom, we used the Schacht Cricket Rigid Heddle Loom but you can use any rigid heddle or multi harness loom with at least 10” weaving width
- Warping board(for warping a multi-harness or indirect warping for a rigid heddle loom)
- 12 Dent Rigid Heddle or Reed
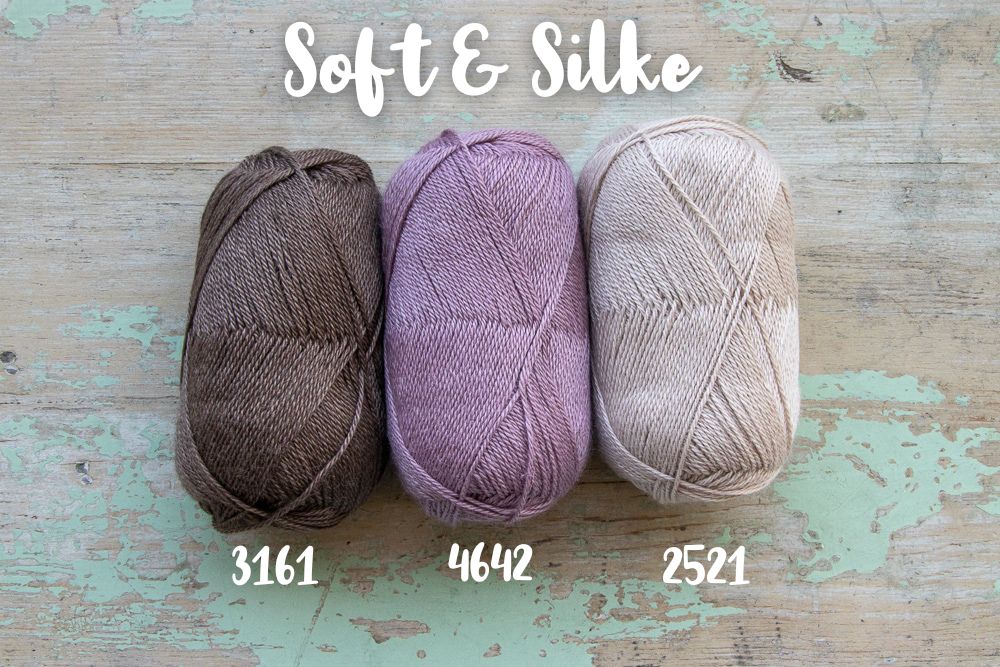
- 3 skeins of Sandnes Garn Alpakka Silke – we used 1 skein of each color: 3161 (brown), 2521 (cream), and 4642 (purple)
- Paper for warp separation
- Scissors
- Fringe twister
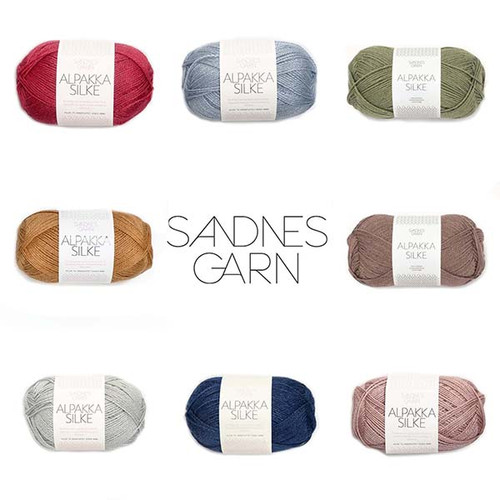
Want to try this out yourself? Check the yarn out below!
Sandnes Garn Alpakka Silke Yarn
$16.50
Sandnes Garn Alpakka Silke This affordably priced luxury yarn is a blend of baby alpaca (70%) and mulberry silk (30%) that offers a shimmering luster...… read more
Check out our videos on how to use a warping board and how to warp a rigid heddle loom with a pre-wound warp!
Pattern: Plain Weave
We wrote this pattern up for a Rigid Heddle Loom but you can also use a Table Loom! Check out our blog post, How to Create Plain Weave on a Multi Harness Loom if you need help setting up your treadles!
Color Management: In this project our Color A is color 2521 (cream) , Color B is 3161 (brown), and Color C is 4642 (purple). If you’d like to choose your own color way, Color A would be your lightest color, Color B would be your darkest, and Color C would be your mid-tone accent.
Warp
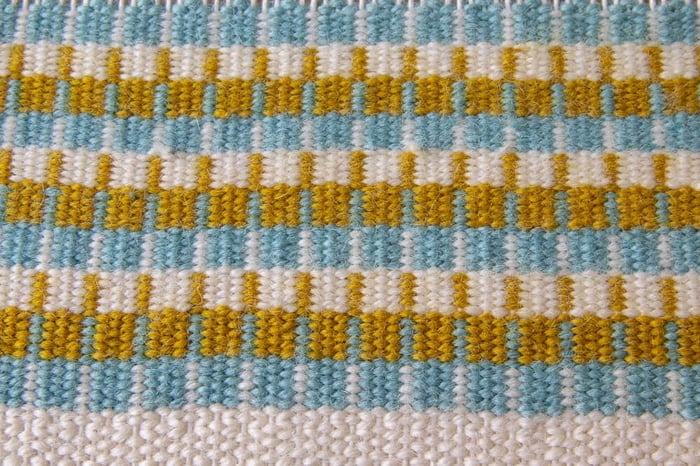
Our warp was 100" long and 8.9" wide. You can really do any pattern of plaid or stripes that you want but if you want your scarf to turn out like ours, use this warp sequence:
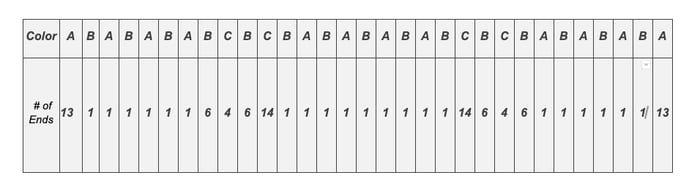
Total = 107 ends (remember the odd ends allows for the last threads to be in a hole)
Weft
The weft should be no less than 12 PPIs. Using the same three colors as the warp, you’ll weave 8 blocks in this weft sequence. They are as follows:
Block 1
13 color A
1 color B, 1 color A, 1 color B, 1 color A, 1 color B, 1 color A (I carried color A up the sides, and ended it when needed, but then kept the color B going to the next section)
6 color B (carried up the side)
4 color C (carried up the side)
6 color B (ended this Color After this block)
14 color C
1 color B, 1 color A, 1 color B, 1 color A, 1 color B, 1 color A, 1 color B, 1 color A, 1 color B (carried both Colors up the side)
14 color C
6 color B (carried up the side)
4 color C
6 color B (carried up the side)
1 color A, 1 color B, 1 color A, 1 color B, 1 color A, 1 color B
13 color A
Block 2
13 color C ,80 color B, 13 color C
Block 3
13 color B, 80 color A, 13 color B
Block 4
13 color A, 80 color C, 13 color A
Block 5
Repeat Block 2
Block 6
Repeat Block 3
Block 7 (This block is not symmetrical!)
13 color A, 80 color C, 13 color B
Eighth Block
Repeat Block 1
Finishing
We left about 6” of warp unwoven on both ends to create fringe. Our fringe was made by twisting bundles of 2 working ends together in each clip of our fringe twister, then letting them twist together to create twisted bundles of 4 total working ends.