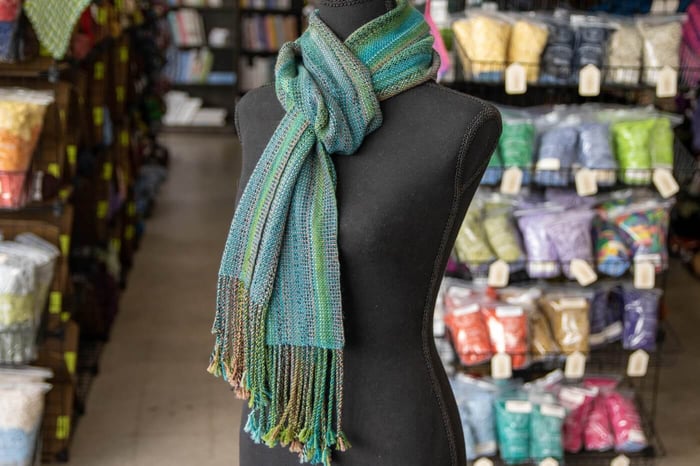
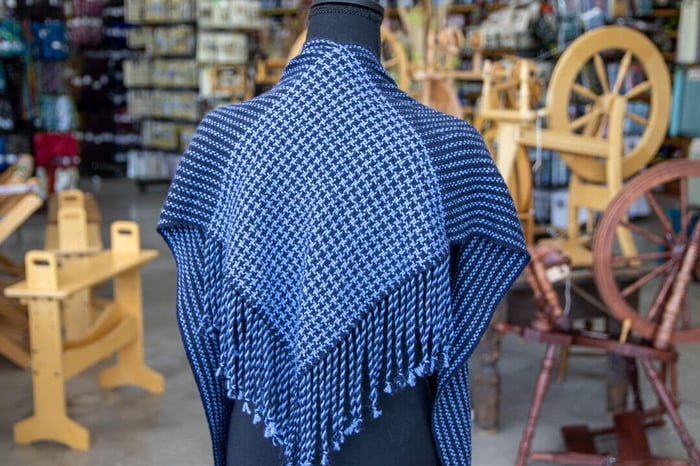
If you’ve woven a few scarves and are ready to try something more adventurous, why not try a V-shawl? The shape lays comfortably on the shoulders without sliding off, and the shawl is 100% shaped on the loom, no cutting of fabric or sewing machine required!
*This project assumes you are familiar with basic warping, weaving, and finishing techniques on a rigid heddle loom.
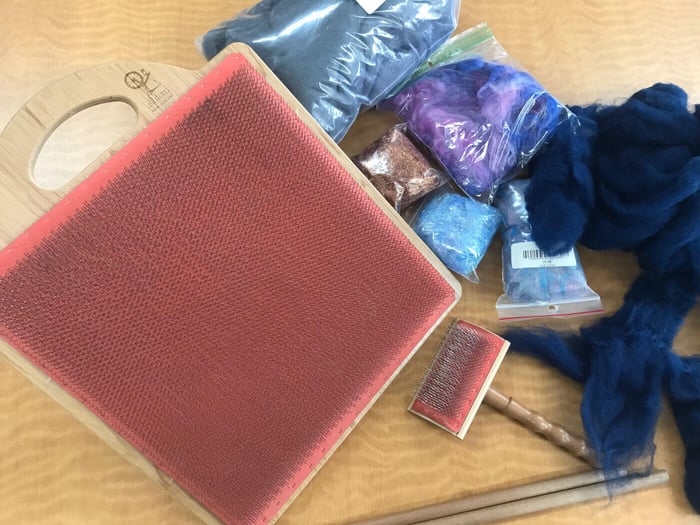
Equipment Needed
- Rigid Heddle loom, at least 15” weaving width (We used the 16" Ashford Rigid Heddle)
- 7.5 dent heddle
- Stick shuttle
- Fringe twister
- Scissors, soft measuring tape, pins, and yarn needle for hemstitching on the loom
- Optional: Scale and ball winder for dividing warp skeins evenly
Note: This project is easily adjustable. For example, if you only have a 10" loom, you can warp fewer ends and make v-shaped scarf instead! If you have a wider loom, you can add more warp threads and make a wider v-shawl, but your yardage requirements and warp length will need to be adjusted.
Yarns
Warp: Louisa Harding Caraz: 1 skein of Prune & 1 skein of Cornflower (you will use 1/2 of each skein for each arm panel of the shawl which is why we used a scale to evenly divide them)
Weft: Louisa Harding Caraz: 1 skein of Prune
- Enough waste yarn for weaving a 1" header. This yarn will not be part of the finished v-shawl. It's only used to keep the weaving in place while you weave the cross. This yarn will need to be easily removed, so a smooth, contrasting yarn of similar weight works best.
Note: We used almost all of the Cornflower, so if you are using a floor or table loom with more loom waste you will need to adjust your yarn requirement accordingly.
Setts
Warp: 7.5 epi (107 ends)
Weft: 7.5 ppi
Warp Length
107 ends, ~80" long
Dimensions (approximate)
Width in reed: 14”
Woven length: 36” for each individual panel before being woven together
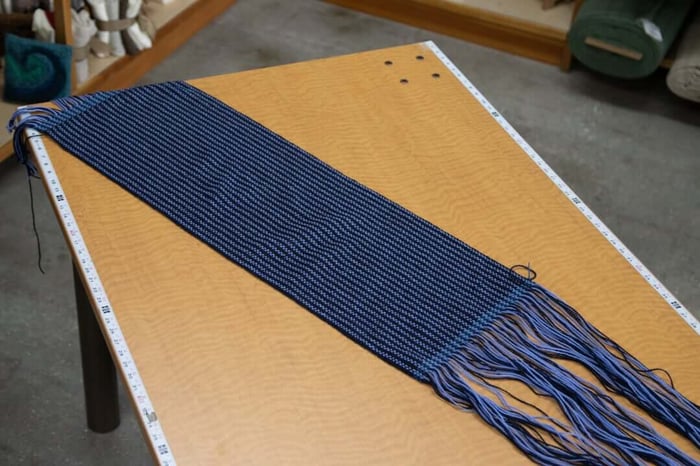
Finished size: 12" x 46" (after panels are woven together - does NOT include 6" of fringe)
Weave Structure
Balanced plain weave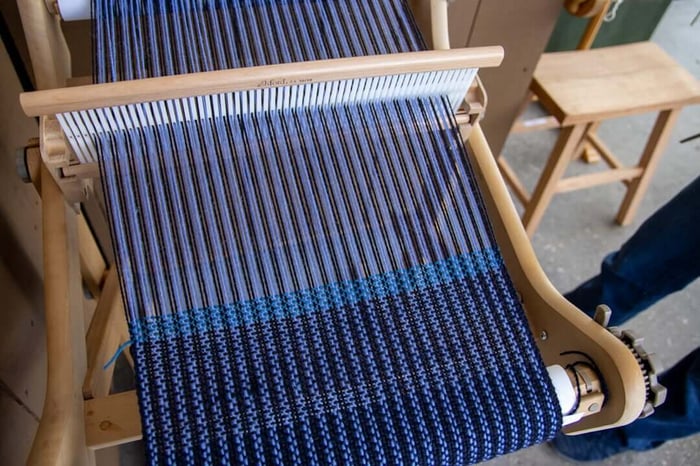
Warp
Since we are using a rigid heddle loom and a fairly thick yarn, we have chosen to warp each “arm panel” of the shawl separately so as not to overload the back beam, but you will need to warp the loom TWICE for this project.
Note: If you are using a floor loom, it is more time efficient to wind a longer warp for both arms at once. Remember to add extra warp length for loom waste and adjust your yardage requirements accordingly when buying yarn! Loom waste varies depending on the loom, but *generally* if using an average floor loom with roughly 24” of loom waste you will need one 5-yard warp instead of two identical 2-yard warps.
Warp Order: Warp 2 threads starting with Prune (or Color A of your choice), then 2 threads of Cornflower (or Color B). Alternate across for a total of 107* ends. 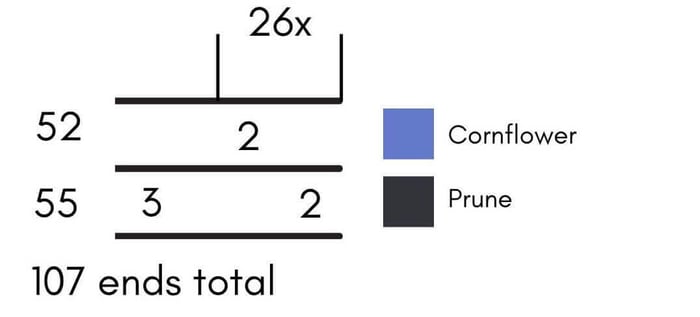
*Our ends are odd so as to have both selvedge threads in a hole. This means that the last stripe will be 3 ends of Prune instead of 2.
Project Steps
The weaving portion of this v-shawl is done in 3 stages: side 1, side 2, and the cross which is where the magic happens!
We have recorded a video tutorial that we highly encourage you view to walk you through weaving the cross section of the v-shawl along with the written instructions. You can view that here:
Side 1
1a.Warp the loom as described above and be sure to leave 6" for fringe. Hemstitch (If you're unfamiliar with hemstitching, this video demonstrates the technique) the beginning edge into 4-thread bundles. Wind your stick shuttle with Plum and weave to 36" (measuring off tension).
2a. Cut your weft (do not weave the tail in, leave enough length to weave it in later) and weave a header about 1” deep using a smooth, contrasting waste yarn to hold the weft in place.
3a. Remove side 1 from the loom without hemstitching by cutting the warp off directly at the back apron rod. (It should look like a very short scarf with extremely long fringe on one end at this point). The leftover warp will become the weft when we weave the cross, so it is important not to cut the extra warp off.
Side 2
2a. Repeat step 1a.
2b. When you have woven ~36”, finish with your shuttle on the right side of the loom and cut your weft yarn, leaving a tail approximately 7x the width of your project. (You will use this tail for hemstitching the “v” edges of the shawl and across the top at the end, so it needs to be at least twice as long a tail as than you would normally leave for a hemstitch.)
2c. Do not weave a header for Side 2 or remove it from the loom.
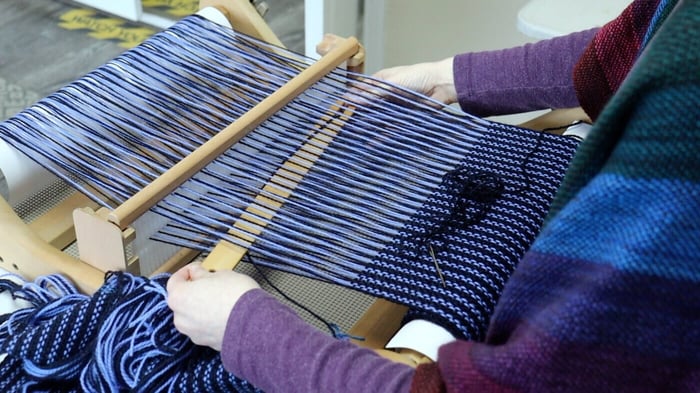
Weaving the Cross
We highly recommend watching our video demonstration of this process here.
1. Lay side 1 at a right angle to side 2 on the left. Be sure that it is oriented so that the selvedge edge of side 1 with two ends of color A is closest to you and the edge with three ends of color A is farthest away.
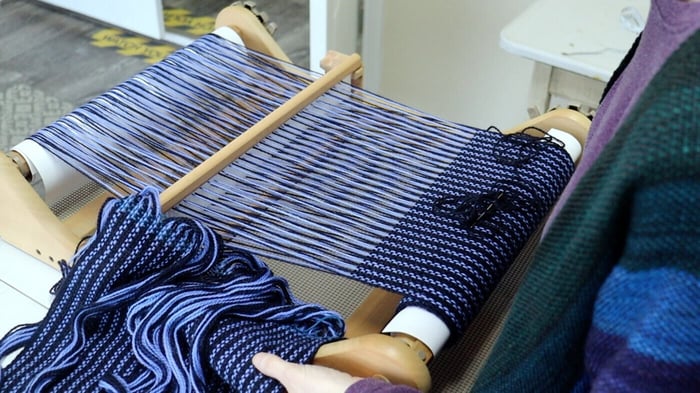
2. Open the next shed on the loom. Carefully pull the first warp thread of side 1 free of the waste yarn header, and use your stick shuttle to push it through the shed. Pull until the last weft pick of side one just aligns with the first warp thread of side 2 on the loom. (You do not want a large gap, but you also do not want any draw in.) Beat the first pick into place and change your shed.
3. For each pick, carefully pull the next warp end of side 1 free of the header and weave it in as weft.
4. Since the warp-as-weft is not turning back at the right selvedge to hold the warp threads in place, in order to secure the weaving along that side you will need to vertically hemstitch as you go every 4 picks. See video for how to do this.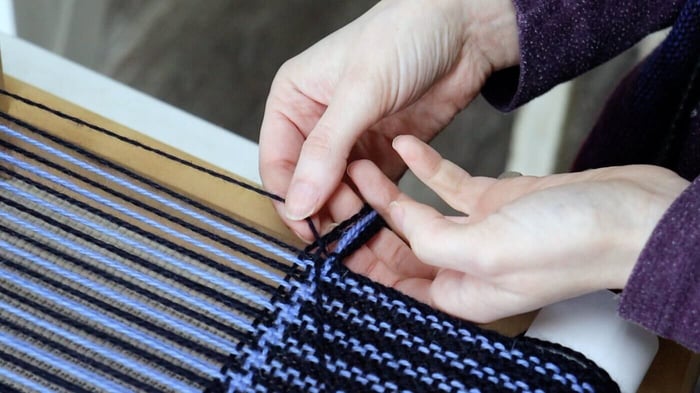
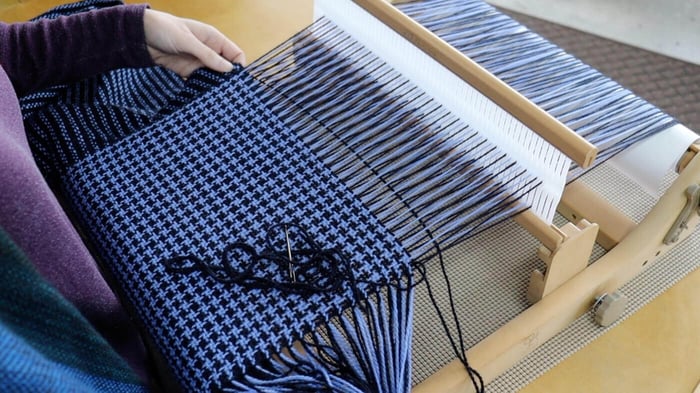
5. When all of the warp threads from side 1 have been woven, normally hemstitch across the fell line using the same yarn you've been using to hemstitch up the side and secure the tail. (This is why we've left a tail 7x the width of our project)
Tips for Weaving the Cross
- Depending on which shed you ended side 1 on, you may need to remove the final pick of weft yarn to make sure the weave structure matches up to side 2 without a doubled thread.
- Do not pull the weft yarns in too tightly, or it will cause a pucker in the finished fabric. Try to maintain an even tension on each weft pick, and try to keep your epi/ppi exactly equal. Minor draw-in should block out in wet finishing to where it will not be noticeable when worn, but aim to make the join as invisible as possible.
- Let the attached fabric from side 1 curve around the front beam as it needs to as you advance your warp, as long as the weft threads are not actually pulling free it will be fine.
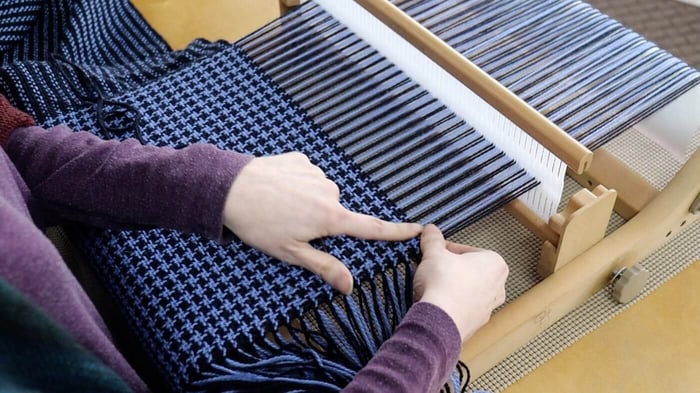
Finishing
Remove from the loom, trim all 4 fringed edges to match, and twist the fringe. Voila! Your woven v-shawl is finished!
|  |
Ideas for Variation
There are many possibilities for this v-shawl technique. We have woven them from yarns ranging from aran-weight wool to sock yarn to 5/2 perle cotton or bamboo. Play with different plaid patterns! See what happens if you use a different color sequence on each side! If you have a floor loom, you can even experiment with incorporating twill structures!
The only limitation is that since the warp will end up also being used as the weft, weave structures utilizing supplemental weft such as overshot or monk’s belt will not work once you reach the cross. Supplemental warp threads can work, as long as they can cross each other in the back section without issue.
Color Combo Recommendations
 |  |
Ashford Rigid Heddle Loom

$315.00
Ashford Rigid Heddle Loom Made of New Zealand Silver Beech, the Ashford rigid heddle loom is available in four weaving widths. The heddle blocks on the inside of the loom are conveniently notched to hold the heddle in place when… read more
Louisa Harding Caraz Yarn

$19.50
Louisa Harding Caraz Yarn Named for and inspired by the celebrated Peruvian mountain range, Caraz is a luxurious blend of and 50% superfine alpaca and 50% Peruvian Highland wool that is super soft to the touch while maintaining excellent stitch… read more